This page is for people who have single Organization or School Admin level access in Possip. If you have District or Network Admin level access, visit this Help Desk article.
First, log in to Possip at https://www.weeklypossip.com/login and go to your "Update Settings" page. There is a quick link from the Welcome Page!

There are three sections you will need to complete:
- Account Settings
- Primary Contact Settings
- Pulse Check® Settings
Keep reading for help on each section.
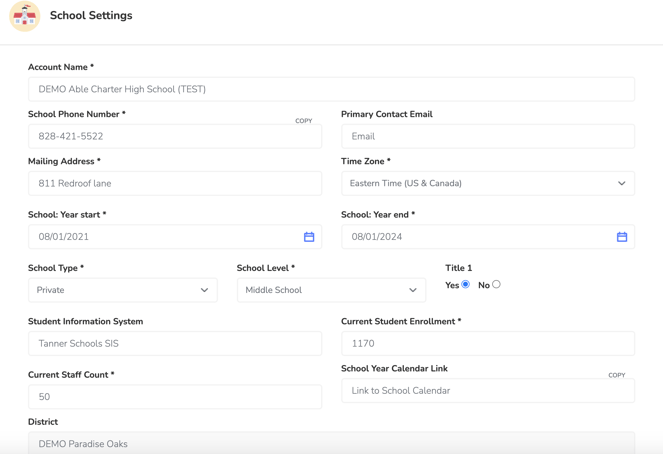
1. Account Settings are details on your school/account or staff account, including things like:
- Year start and end dates, so we know when to start and stop Pulse Checks
- A link to your calendar, so we know when to pause Pulse Checks during holidays or breaks
- For Schools, Student Information System, so we can learn about SIS integration capabilities for your account
- Title I designation, so we can give you comparable data to similar accounts
- Current Enrollment, Community Members, or Staff Count
- If you are sending family or student Pulse Checks, input your total student enrollment on your campus.
- If you are completing the Settings page for staff or community Pulse Checks, use this field to input your total staff or user count.
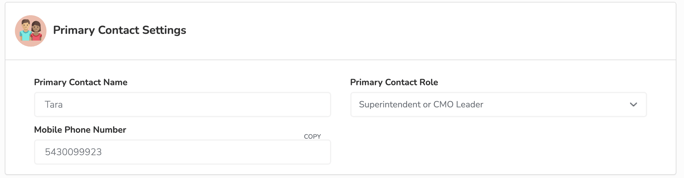
2. Primary Contact Settings are details on the person leading Possip at your school or organization:
- Primary Contact: We'll contact this person about the service, agreements, and big opportunities.
- Mobile Phone Number: Sharing a mobile number and consenting to receive texts means we'll include you in our customer Pulse Check - routinely checking in on your happiness.
- Consent Form URL: A field where you share a link to language asking your survey recipient group to grant permission to receive SMS messaging from Possip. (This may be a link to a webpage or to a handbook where your consent to receive communication language is stored. Learn more here.)
3. Pulse Check Settings are details on how and when you want to send Pulse Checks:
- Pulse Check Name is the way you want your school or staff account name to appear in the Pulse Checks survey text.
- Pulse Check Day of the Week can be Tuesday-Friday, and we'll always send on that day.
- Pulse Check Start Date must be the Monday of the week you'd like to send your first Pulse Check. Using the example below, if your Pulse Check day of the week is Wednesday, we'd send your first Pulse Check Wednesday, August 10.
Please select a Pulse Check Start Date at least one week out.
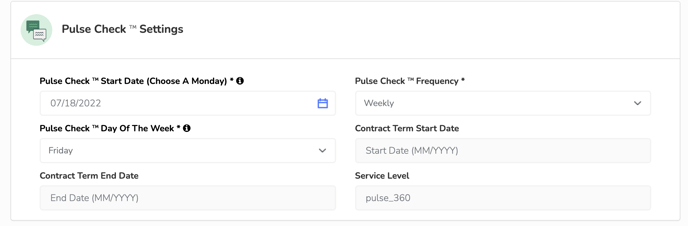
Please note: If you are unable to adjust the Pulse Check™ Start Date or Day of the Week, it is because your district or network controls that setting.
Noticing the page is not saving? Make sure all required, asterisked fields are completed and then click "Update Settings" to save.
Have questions? Email or chat with us!